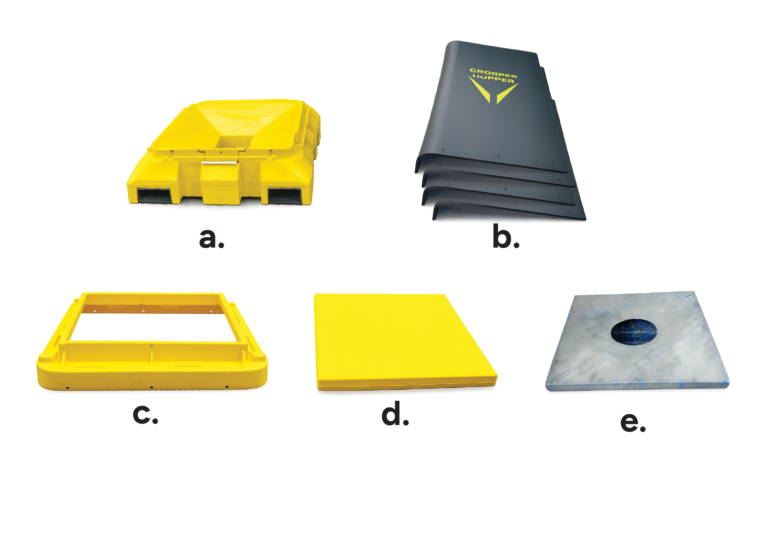
Your Cropper Hopper is supplied in eight distinct pieces:
a. 1 x base moulding, complete with slide hatch and fork tine pockets
b. 4 x wall panels
c. 1 x Wall Crown Moulding
d. 1 x Lid Moulding (supplied fitted to Wall Crown moulding)
e. 1 x Parts Box (contains fasteners and silicone sealant)
The wall panels are shaped and pre-drilled to neatly fit down into the moulded retainer groove in the base moulding.
Place the wall panels into the retainer groove and push down firmly to seat them firmly into the retainer groove.
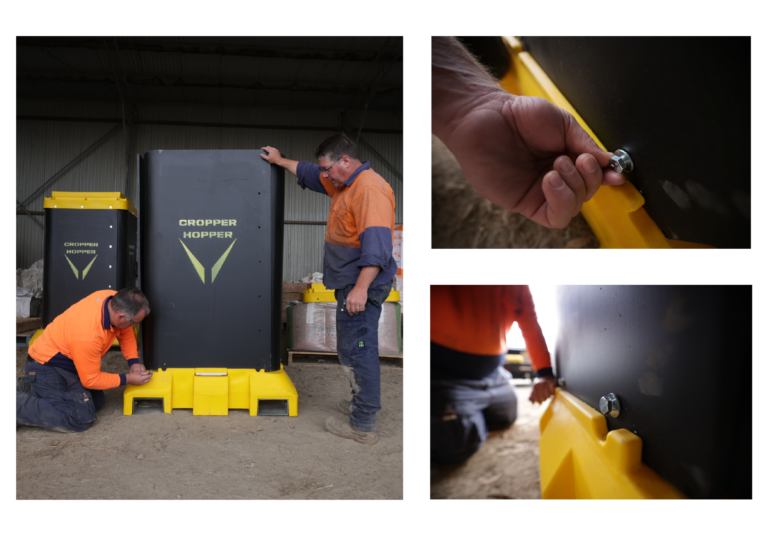
Using the fasteners in the bag labelled ʻBASE’, place a washer onto each bolt and secure the wall sheets to the base. Do not tighten the bolts more than finger-tight at this stage.
Once the wall panels have been attached to the base, separate the wall crown and lid mouldings. Lift the Wall Crown moulding onto the top of the wall panels and settle it down firmly onto the top of the wall panels.
NOTE: Take care to ensure that the lid retainer studs are aligned with the side of the Cropper HopperTM (i.e. not on the same side as the slide hatch).
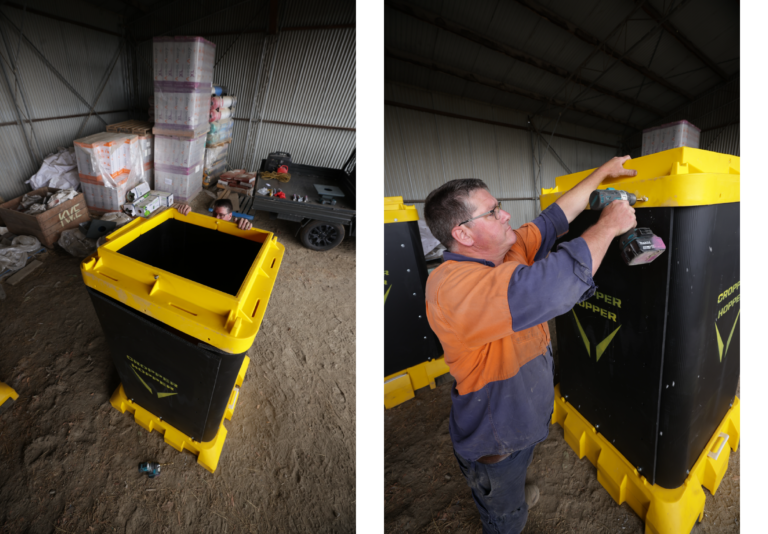
While maintaining firm downward pressure on the wall crown, drill through the top of the wall panels at the positions pre-drilled in the wall crown.
Using the fasteners supplied in the bag labelled ʻTOP’, attach the Wall Crown, ensuring that each bolt has a washer on the inside and the outside of the hopper. Bolts should be inserted from the outside, with a washer and nut inside the hopper.
Tighten the nuts onto the bolts, taking care not to overtighten and crush the wall panels. Once the top bolts are tight, return to the base bolts and tighten these firmly, taking care again not to overtighten them.
Now that the base and top of the Cropper HopperTM are firmly joined and secured, the wall panels can be secured together.
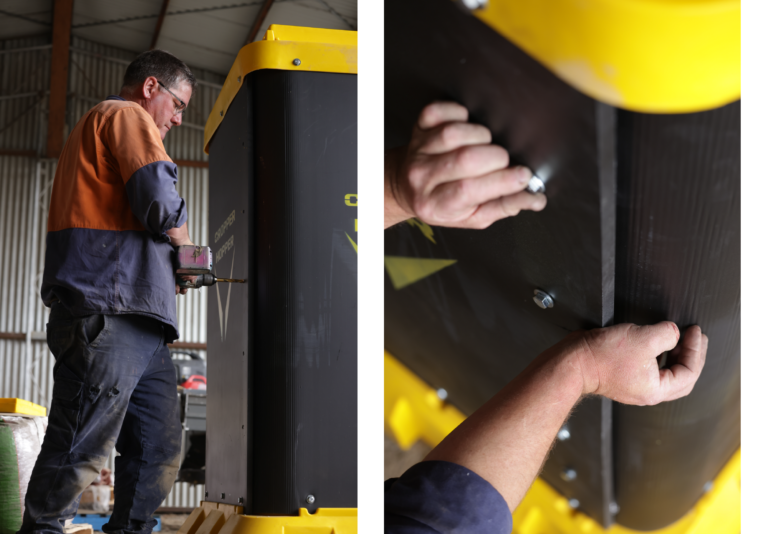
Using the pre-drilled holes as guide holes, drill through the walls of the Cropper HopperTM. Using fasteners from the bag labelled ʻWALLS’, fasten the wall panels together, ensuring that each bolt has a washer both on the outside and the inside of the hopper. Bolts should be inserted from the outside, with a washer and nut inside the hopper.Tighten all nuts onto the bolts, taking care not to overtighten and crush the wall panel.
Once all fasteners are in place and are firmly tightened, we recommend sealing the Cropper HopperTM from the inside using the silicone supplied
Using a clean rag, wipe the surfaces that are to be sealed. Apply silicone around the base of the Cropper Hopper between the moulded base and the wall panels. Apply adequate silicone to ensure a good seal.